Learn how to create a digital planner in Canva. It’s easy to make a digital planner on Canva with FREE planner templates in this Canva digital planner tutorial.
I have previously written a whole post on apps to create your own planner. But today I wanted to share a new quick and simple way ANYONE can make a planner!
Canva.
If you have not used Canva before, you are going to love how fast you are going to be able to create a Canva personal planner. The best part is that there are so many FREE digital planner templates available that you are sure to find one that suits your needs and style.
This tutorial will teach you how to create a whole digital planner using Canva. Firstly, using a Free Canva Planner template, secondly how to download and use purchased digital planner templates, and lastly how you can create your own page templates.
Excited to get started?
We may get commissions for purchases made through links in this post. For more information go to Disclaimer & Disclosure.
Canva Planner
New to Canva? Let’s learn some basics before starting on your very own Digital Planner.
Canva is an easy-to-use design platform. Like…really easy!
You can make designs from scratch using elements in Canva or by downloading your own images or graphics. Or there are ready-made templates for almost any project you can think of. From party invitations to work projects you can create the perfect design in minutes.
Anyone can use Canva for free ( I will show you how to set up an account next) but there is also the option for Canva Pro. You don’t need a Canva Pro account to create a Digital Planner. However, Canva Pro may have templates you prefer as well as some great extra options such as making it easier for you to re-size documents and download files with different formats.
If you’d like to try Canva Pro you can get a 30-day free trial with my affiliate link here.
Canva also has an amazing online learning center. Here you can find tutorials and videos that will help you use all of the cool features, tools, and more in Canva. To access this, when you are in Canva just head up to the top toolbar and click on ‘Learn’
But you are here to learn all about creating a digital planner in Canva, right? So let’s get started!
Can I create a digital planner in Canva?
There are four ways you can create Digital Planners in Canva.
1. Using Our Canva Digital Planning System.
2.By using the Free Digital Planner templates in Canva
3. By purchasing and downloading Digital Planner Templates for Canva
4. Making your own Digital Planner templates from scratch.
I will show you how to create a Digital Planner in Canva with step-by-step instructions for all four options. I have used the desktop website for this tutorial but you will find that the Canva App is also simple to use and will have similar steps.
CREATING A DIGITAL PLANNER WITH OUR CANVA DIGITAL PLANNING SYSTEM

I may be a little bit biased but Canva Digital Planning System is by far the quickest and easiest way to create amazing Digital Planners.
In fact it is so simple that you can create unique and complete working Digital planners in less than 2 hours, even if you are a total beginner!
Here is how it works.
1. Purchase The Digital Canva System
CANVA DIGITAL PLANNER SYSTEM

This system is designed to help you create a visually stunning, highly functional and user-friendly digital planner AND list it for sale in less than 2 hours…
Even if you are a total beginner…
Don’t believe me?
2. Sign In To Your New OnLine Course
Once you have purchased the Canva Digital Planner System you will receive instructions on how to sign in and access your new online course on Teachery.
3. Follow The Instructions and Video Tutorials To Create A Canva Digital Planner

Every step of creating your unique Digital Planner in Canva is set out in a super easy to follow system.
From creating a FREE canva account to downloading your new Digital Planner Canva Templates and customizing these templates.
It only takes a few simple clicks to go from this:

To this:

There are video tutorials so you can watch and follow along as well as a written workflow for those that prefer reading the instructions.
You will also find so many bonuses that help you create a Digital Planner that stands out from the crowd such as our Metal Color Sheet to help you choose metallic finishes for Binders, pens and more with a couple of clicks.
Helping you turn this:

Into realistic elements like this.

If you want to create Digital Planners to sell you will love the Digital Listing Template to help you create beautiful listings on Etsy in a mater of minutes.
Want to try a different method to create your Digital Planner? Keep reading to find out more.
Creating A Digital Planner In Canva With Free Digital Planner Templates
Using the free digital planner templates in Canva is a quick and easy way to create your own planner. The great thing is that you can still customize pages with text and colors for many of the templates.
1. Create A FREE account with Canva
Head to the Canva website.
Click on a purple ‘Sign Up’ box on the front page ( There is one in the toolbar at the top and one in the center of the page). You can then sign up via Google, Facebook, or Email. Select whichever option is easiest for you and follow the prompts for signing up.
Next, Canva will ask what you will be using the site for after signing up. Select the option which applies to you ( ‘Personal’ is probably the best choice as a beginner).
After this, you will see a pop-up to try Canva Pro. For this tutorial click the ‘Maybe Later ‘ button at the top right. You can create amazing designs using the free Canva account and if you decide you want different templates or the pro features you can easily upgrade to Pro later.
You may also like: Create A Digital Planner To Sell
2. Create A Design
Next head to the top right of your Canva screen and click ‘Create a Design’.
A drop-down menu will appear. In the search bar type in ‘Digital Planner’. Now you will see options for planners. The standard size for a Digital Planner is 8.5 × 11 inches so you could select that from the drop-down menu. I clicked on ‘cute planner’ because it sounded like it may have some fun templates.

3. Choose A Digital Planner Template
Now you will see a screen with a blank page and then templates on the left-hand side.
Here’s where you have fun!
Simply scroll through until you find a template you like. You can also use the search bar to find more templates. You could try ‘weekly planner template’, ‘Digital Planner Coverpage’ or anything you think will bring up templates that will be useful to you.

Have a think about how you want your planner to be set out. For example, you may start with a cover page, then have a goals page, weekly pages, and then to-do lists. It is all up to your personal preference and needs.
To select a template simply click on the template you like and it will appear on your design. If you see a small crown at the bottom of a template it means that this is a paid option. Some designs will also have a watermark on them. You will have to pay to use this design too if you do not have Canva Pro. There are lots of free templates to use though.
Once you have selected a template you can then edit the design.
4. Editing Canva Templates
How much you can edit each template will be slightly different depending on the individual template. If you click on an element on the template it will give you any editing options available.
For example, clicking on the text will let you change the wording and font type, and size. If this option is available on the template you have chosen, simply add what text you wish in the text box and then change the font options in the toolbar above your design.
If you click on other elements on the page you may have the option to delete elements you don’t want as well as change colors and sizes
To change colors on a template. Click the element you want to change the color for and a box will appear at the top of your design, click this and you can then select the color you want.

NOTE: Every template will have slightly different editing choices, and some you may not be able to edit at all.
5. Add Digital Planning Pages
At the bottom of your design, you will see the option to ‘Add page’. Simply click this and a blank new page will be added to your Digital Planner.
You can then choose your next template.
In the example below, I picked a weekly template. I wanted to make it match the cover page so I clicked on the floral element from the cover page, a white box will appear with a symbol that has two rectangles with a plus sign. This is ‘duplicate’ ( if you click on the three dots you will also see more options you can play with). Once the element has been duplicated you can click and drag the element onto the new template.

Again you can choose to edit the template so that it suits your planning needs and style.
6. Duplicating Canva Templates
If you want to repeat a page you can find the ‘Duplicate’ option at the top of the page design. This makes it easier if you are creating all your weekly pages for example.

Now keep creating new pages until you have all the pages you want in your Planner.
7. Download Digital Planner In Canva
Once you have all your pages ready ( and have made sure you have no spelling mistakes or errors) you can download your completed Digital Planner to use.
Firstly, you will want to name your planner so that it is easy to find once you have downloaded it. In the blue toolbar, you will see the area to name your file, right next to the ‘Try Canva Pro’ button. Just click on this ( it will be named the template you first used by default) and type in your new file name.

Next, click on ‘Share’ at the far right of the blue toolbar.
In the drop-down menu, click ‘Download’. Then you will want to select ‘PDF Print’ and click ‘Download’.

Your digital planner is now ready to upload to your notetaking app and use. If you are not sure how to do that you can find out how to upload a digital planner HERE.
If you are not able to find the right templates for you or want more customization in your digital planner then you may want to look at the next option for creating Digital Planners in Canva.
How To Use Purchased Digital Planner Templates In Canva
Although the Free Digital Planner templates are fantastic you may want to look at paid templates. This can end up saving you lots of time and effort as many of the templates will come as whole digital planners.
You will also find that you will have so many more options available with styles, page designs, and hyperlinking ( a must-have element in any efficient digital planner).
Here’s how to use paid digital planner templates on canvas.
1. Purchase your Canva Digital Planner Template
There are lots of places you can find digital planner templates for sale. You can, of course, buy them straight from Canva by upgrading to Canva Pro but you can find done for you digital planner templates on Etsy, Creative Market, and through websites.
It is important to note that you make sure that the templates are designed for Canva.
Make sure you read all information before purchasing a template. Such as how much you are able to edit, licensing, and what notetaking apps it is compatible with.
If you are looking for Digital Planner Canva templates with selling a Digital Planner in mind then be sure to check out this amazing CANVA TEMPLATE KIT. It even includes Canva templates for Etsy listings and Pinterest to help you market you new Digital Planner.
Looking for realistic planner features? Our Gorgeous Planner bundle has everything from textured covers to digital sticky notes, binder rings, and lots more.
Click below to find out more.
WANT TO MAKE REALISTIC-LOOKING DIGITAL PLANNERS…
With no design skills… or expensive design programs!?
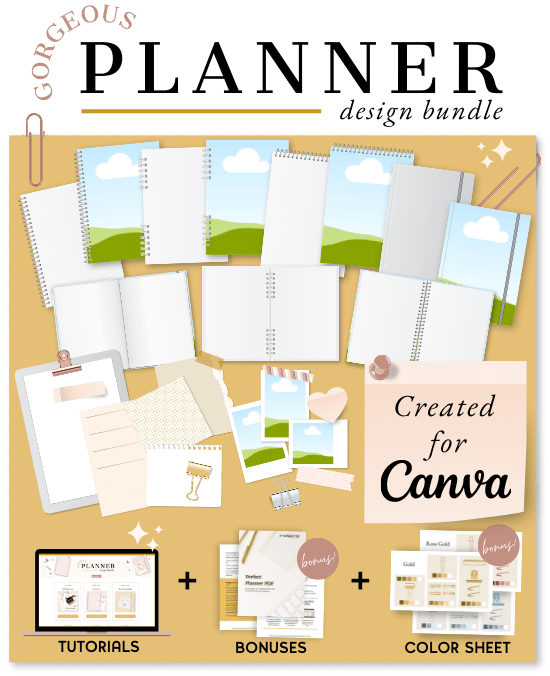
Check the Gorgeous Planner Design Bundle!
With 50+ fully editable designs, created for Canva!
Once you have purchased your template you will want to upload it to Canva.
Lots of sellers will include instructions for you on how to do this. In our Gorgeous Planner Bundle, we make it super simple with video tutorials and by sharing templates.
If you cannot find instructions with your template don’t worry, firstly make sure you have downloaded your template to your desktop or device. Next, here’s how to upload a template to Canva.
2. How To Upload A Digital Planner Template To Canva
On the Canva homepage ( you may need to click on the Canva icon to go reach this page), you will see a large blue box with ‘What will you design today?’. At the right of this, you will see a button with ‘Upload’. Once you click on this you will be able to select the Digital Planner template you have purchased from your files.

Choose the file from your device ( it will likely be in your ‘Downloads‘ area) and upload it.
3. Edit Your Digital Planner Template
Depending on the template you have chosen you can now make edits to your Digital Planner. Follow steps 4 onwards from the previous instructions and you will be ready to use your personalized digital planner.
Can’t find all the features you want in a template? Why not make your own Digital Planner from scratch? It’s not as difficult as you may think.
How To Make A Digital Planner In Canva From Scratch
If you have some free time and love being creative why not learn how to make a Digital Planner right from scratch? It’s a great way to make a planner that has all the elements you want and love as well as being able to pick a style that makes you smile every time you use your Planner.
1. Create A Design
On the Canva home screen head to the top-right and click the purple box that says ‘Create a design’.
On the drop-down menu, you will see the option for ‘Custom Size’.
A new box will then appear. you can select the width and height of the design. Select ‘1668 x 2388 pixels.‘.
After you have entered your measurements click ‘Create new design’.

2. Learn The Tools To Design Your Digital Planner Pages
Next is the fun bit..designing your planner pages.
When you first start creating it can take a little while to get used to the tools and design but it won’t take long before you are creating pages in no time.
Most of the tools you will use to design your planner pages are in the left-hand toolbar.
- Design – This is where you will find templates. As seen early in this tutorial, templates can be great for quick projects but you will need to make your own pages if you want all the elements you really like and need.
- Elements -This is a tool you will be using the most. With this tool, you can add elements to your designs such as graphics, shapes, lines, tables, and lots more. To look through the options simply scroll down or search for the element you want in the search bar.
- Uploads – Upload images or graphics here. You can add graphics to your Digital Planner from sources like Creative Market here to personalize your planner.
- Text – Us this to add text to your design, and change fonts, font size, color, and other options. This is where you can add your page headings, days, titles, etc.
- Projects – Use this tool to find all the designs you have made.
- Apps – You can add apps to your Canva designs here. I won’t be covering this tool in this tutorial.
Each tool on the left toolbar has extra tools available when you click on it. you can find these extra options on the toolbar above your design. These extra tools allow you to alter and change an element you have added to your design.
If you click on the Text tool for example, you will then be given extra tools that allow you to change the font style, size and line spacing, and more.

If you are brand new to Canva make sure you have a play around with all these tools and maybe even watch a few of the tutorials in the ‘Learn’ section I mentioned earlier in the post.
Another great tool to use when creating Digital Planners is at the bottom of the screen. There are a few tools here but the one that you will want to use is the slider option. This tool lets you increase the size of your design so you can see your design close up while you are creating it.

3. Plan Your Digital Planner
Before you start creating anything in Canva it is a good idea to sketch out a plan for the Planner you are creating.
- What Pages will you need in your Planner?
- What pages are going to help you be more productive, organized, and get you slaying those big goals?
Some pages you may want are to-do lists, weekly pages, daily pages, monthly pages, a cover page, trackers, and more. Take a look at places like Pinterest for inspiration.
It is also a good idea to think about what order you want your pages in.
Now you know what pages you need you can start to design your Digital Planner.
4. Design A Cover Page
A cover page will be the first page you design in your planner. Follow along in the video above to see how this is done!
In ‘Elements’ you can search for a photo or backdrop that you want to use for your cover page. If you cannot find an image you like then you can upload a graphic or image.
Click on the image to add it to your design. You may need to drag out the image to make it fit the whole page of your cover page ( or place it where you want on your page).
You can also change background colors and add individual elements. You are only limited by your imagination with Canva!
Next, click ‘Text’. You can choose from a template or have fun playing with fonts and design until you have something you love.
5. Design Your Digital Planner Pages
Click on ‘Add page’, and you are ready to create a digital planning page.
Firstly, set the size of your page with the slider tool so that you can see your designs clearly.
Click on ‘Elements’ and select the graphics you want to use. Depending on what page you are creating you could select a shape such as a square or search for elements such as ‘Table’. Under the search bar are even more search options. I think ‘Graphics’ is the most useful when designing Digital Planning pages.

When you first start creating a planning page it is going to take trial and error as you learn how to use Canva smoothly and learn how designs come together. You will find you get better, and quicker as you go along.
Some notes to help:
- To move elements around click on them, hold the mouse button then move your mouse.
- To increase or decrease the size of the element drag one of the corners or sides. To keep the rations the same as the original hold down the ‘Shift’ button on your keyboard while you drag the element.
- Just like templates not all elements will have the same editing options.
- To go back after making a mistake just click the curved arrow in the top left.
- As you move elements guides come up on your page to help you place elements in line. A tool you may find useful is ‘Position’. Select the elements you want to align together then click ‘Position’ in the top right. From here you can select space evenly, align and tidy up to help get your elements in the right places.
Once you have all your elements in place click ‘Text’ to add headers, notes, quotes, and more. You will want to play around with fonts and sizing. Be sure to not use too many fonts on one page and to make your Digital Planner more cohesive use the same fonts throughout your planner pages.
Next, you will want to style your planner pages. Again try to make this cohesive throughout your whole planner. You can pick elements such as flowers, or fun themes. Play around with how they are positioned on each page and be sure to use the color selector to make sure your page background and fonts match the theme.
6. Download Your Digital Planner
Once you have all your pages ready ( and have made sure you have no spelling mistakes or errors) you can download your completed Digital Planner to use.
Firstly, you will want to name your planner so that it is easy to find once you have downloaded it. In the blue toolbar, you will see the area to name your file, right next to the ‘Try Canva Pro’ button. Just click on this and type in your new file name.
Next, click on ‘Share’ at the far right of the blue toolbar.
In the drop-down menu, click ‘Download’. Then you will want to select ‘PDF Print’ and click ‘Download’.
Your digital planner is now ready to upload to your notetaking app and use. If you are not sure how to do that you can find out how to upload a digital planner HERE.
Discovered You Love Making Digital Planners?
Why not create an income doing something you enjoy?
When it comes to creating beautiful and unique digital planners to sell, you should not only consider the design part of the planner but the functionality, marketing, and promotion of your planner too!
That’s why I recommend investing in the Passive Income Planner Girl course.
This online course isn’t just about using the programs to create your planner (although they do have tutorials for a range of programs) but more about creating your heart-centered business with fans that love your products.
Ready to start your own online business you love? Want a passive income that you enjoy creating products for? Click below to find out more about the Planner Girls.

More Digital Planner Tutorials


PIN FOR LATER!
