Do you have a set of digital stickers for GoodNotes but no idea how to insert them quickly into your Digital Planner? Keep reading to learn the easiest way to add digital stickers to GoodNotes.
One of the best things about digital planners is how you can reuse stickers and create your own sticker books from your favorite designs. Not only is it great for the environment but it can also save you lots of money ( I used to spend so much money on stationery with paper planners!)
If you are new to using Digital Stickers in your planner then you may be using the ‘image tool’ to add stickers to your Digital Planner. But adding images one by one to your digital planner can be extremely tedious.
Luckily there is another…and a much faster way.
Keep reading to learn how to import several digital stickers at once to GoodNotes.
It’s really easy, even if you are a Digital Planner beginner.
We may get commissions for purchases made through links in this post. For more information go to Disclaimer & Disclosure.
One important thing to note before you begin this tutorial on how to use stickers in Goodnotes. Importing stickers is not the same as importing a planner to the app. Click here to learn how to add a digital planner to GoodNotes.
How Do You Add Stickers To GoodNotes?
The easiest way to put stickers on a PDF in GoodNotes is to open iPad split view. When the screen is split you just need to tap and hold on to an image in your GoodNotes digital planner.
You can also just copy and paste a sticker if they are already being used on a notebook inside GoodNotes.
If you have a GoodNotes sticker book then this will be the method you use for adding stickers to Goodnotes. If you purchase Digital Stickers online through stores like Etsy then this may be how you receive the files.
Below you will find out how to add stickers on Goodnotes with each different method.
New To The GoodNotes App? Learn How To Use GoodNotes For Digital Planning HERE
Method 1: How to Insert PNG images in goodNotes
You can use the ‘image’ tool to add an image ( which is basically what your Digital Sticker is ) to your planner. However, this can take a long time if you have multiple images that you want to add.
Here is the step-by-step tutorial on how to add stickers to GoodNotes in case you want to import several PNG (or JPEG) files at once:
- Open your GoodNotes App.
- Create a ‘new document’ to collect all of your stickers in one place or open your Digital Planner’s sticker tab if it has one.
- Now start split view on your iPad screen to be able to see your photo folder and planner side by side. To split the iPad screen you need to gently swipe up from the bottom of your screen until you see the dock. The ‘iPad Dock’ shows your favorite apps or those you that you have opened recently.
- Tap and hold the app where your stickers are located, then drag it to either side of the screen to start split view.

- Once the view is split you can use both apps at the same time. Locate the Digital stickers you want to use in GoodNotes.
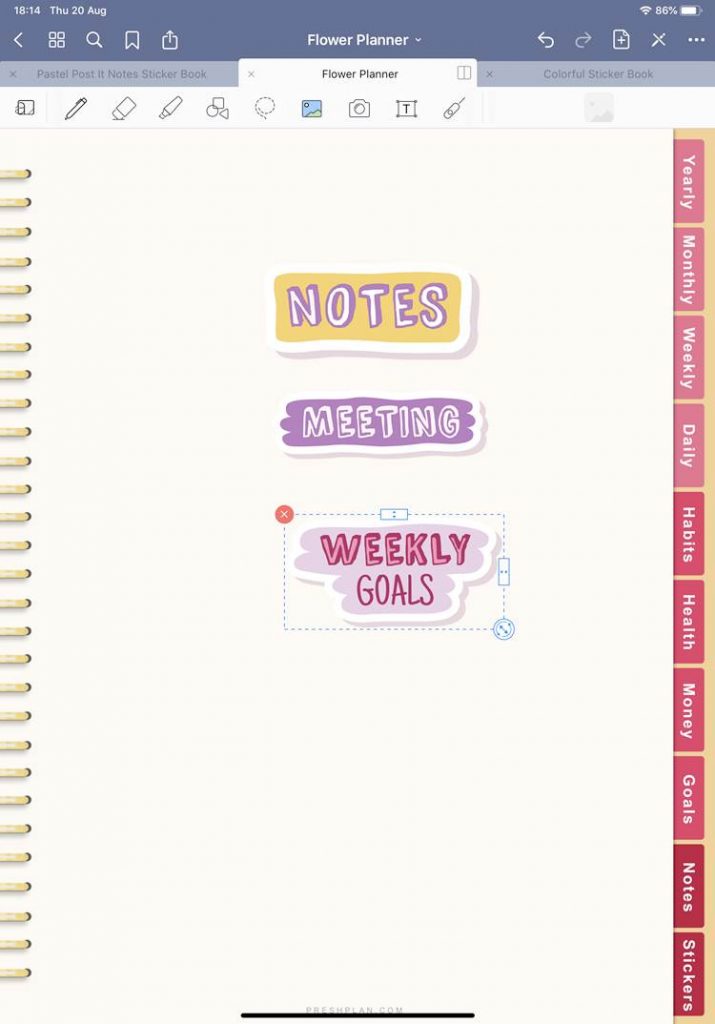
- Tap and hold the sticker you want to import for a second to select it then drag it onto your digital planner.

- Repeat the process for all the images that you want to add to your planner.
- Once you have imported all the stickers you want slide the folder app to the side to get GoodNotes in full screen.

And you are done.
Now you can resize and place the sticker wherever you want using GoodNotes ‘lasso’ tool.
Method 2: How do you copy and paste stickers in GoodNotes?
If you have stickers already in other notebooks inside GoodNotes then you can easily copy and paste the images to any notebook you want.
This is also the method you will use if you have created or purchased a sticker book with several pre-cropped images.
Here’s how you copy these Digital Stickers to your planner:
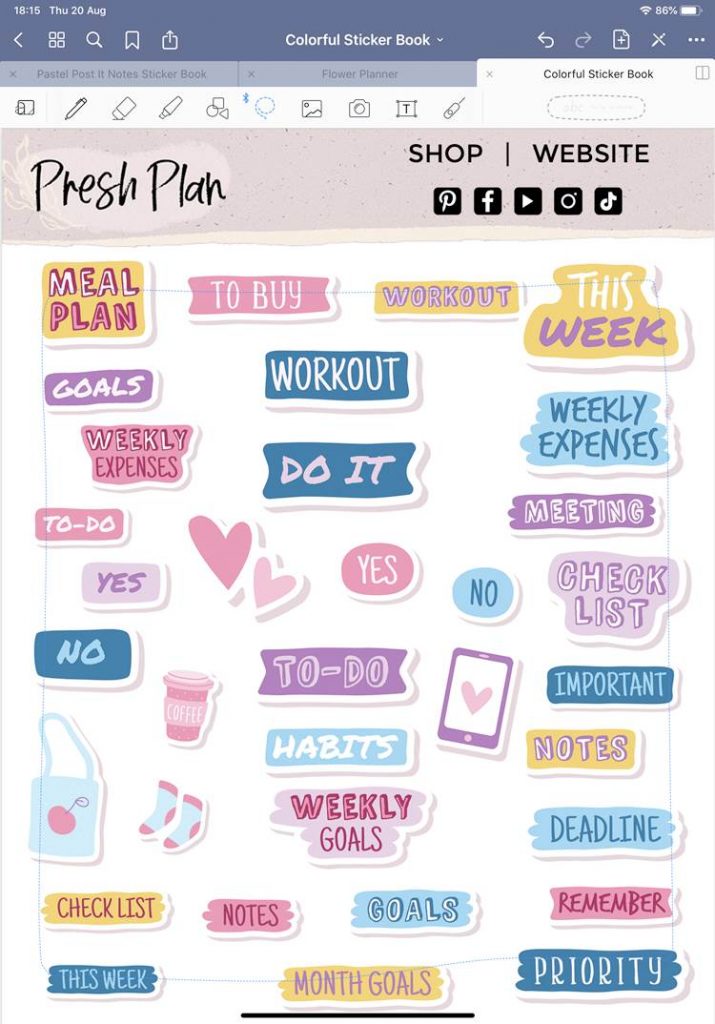
- Open your sticker book (or the document where you already have the sticker imported).

- Now use the ‘lasso’ tool to make a selection of all the items you want to copy.

- Tap on the page again until the option to ‘copy’ the selection appears.

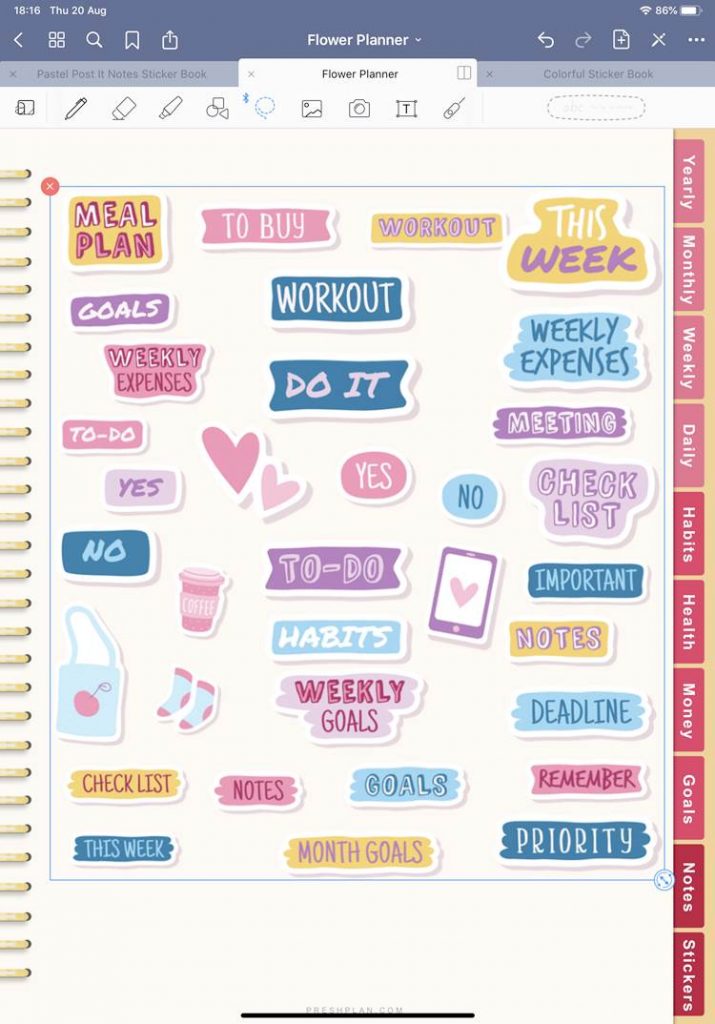
- Go back to the digital planner and, with the ‘lasso’ tool selected, tap and hold the screen for a second until the option to ‘paste’ pops up.

Tap on this to paste the stickers.
Now all the stickers are in the new Notebook, or Planner. Just resize, them or move them to the Planner pages as needed.

And there you have it, now you can easily add digital stickers to GoodNotes!
Love these digital stickers? Find them in my shop!
Or looking for a faster and easier way to create Digital Sticker? Check out our amazing Digital Sticker System HERE
For more GoodNotes tutorials for digital planners be sure to check my other posts below.
GoodNotes digital planner posts:
PIN FOR LATER!


