Want to change notebook cover in GoodNotes 5? I’ve got you! I’ll show you two easy ways to change your GoodNotes notebook covers or digital planner covers in no time at all.
GoodNotes App is perfect for taking notes and digital planning.
There are so many different ways to use Digital Planners. Some people prefer one large Digital Planner that they use for all parts of their lives. Others prefer to have separate Digital Planners for things like family life, work, and even special ones like a Goal Planner.
One simple way to have individual planners is if you have a digital notebook or undated planner, then you can create copies of these items and re-use them for different subjects or planning purposes.
When I re-use an existing document I like to have a different cover for each Digital Planner to it so I can easily spot the notebook I want in my library rather than scrolling through and tapping on documents to check which one I need.
Digital Planning is all about being more productive and efficient.
By making a little effort to set up your Digital Planners like this you will find that you will save yourself time…and of course, they will look amazing too!
The easy tutorial below will come in handy if you wish to import a custom cover to your app or change it from the existing free templates.
I’ll show you 2 ways how to replace the covers in GoodNotes.
The first method includes changing the cover when the extra covers are included in the document you have downloaded. And the second method is to add a cover from another location.
So let’s get started.
We may get commissions for purchases made through links in this post. For more information go to Disclaimer & Disclosure.
How To Replace A Digital Planner Cover In GoodNotes
Here’s a quick tutorial showing you 2 ways to change an existing GoodNotes cover template.
These methods work for both JPEG and PDF files.
Firstly, open your application and find the planner which you want to change the cover for.
Method 1: Switch The Covers Included In Your Document
For this example, I am using a digital planner I created. It has 4 different covers inside the planner download.
Looking for a Digital Planner For Goodnotes? Try my Digital Journal Kit…I know you are going to love all the great features. I have included lots of easy-to-follow video tutorials too, making it perfect for Digital Planning beginners.
To change the cover you first have to go to the ‘page’s settings tab‘ at the top left corner of the app screen.

Here you can select, rearrange or delete pages of the document you have open.
To change the cover, I am going to drag a different cover to the first position of the document.
I could also have just deleted the unwanted pages, but I find that it is handy to have them in your document in case you want to use them for another time.
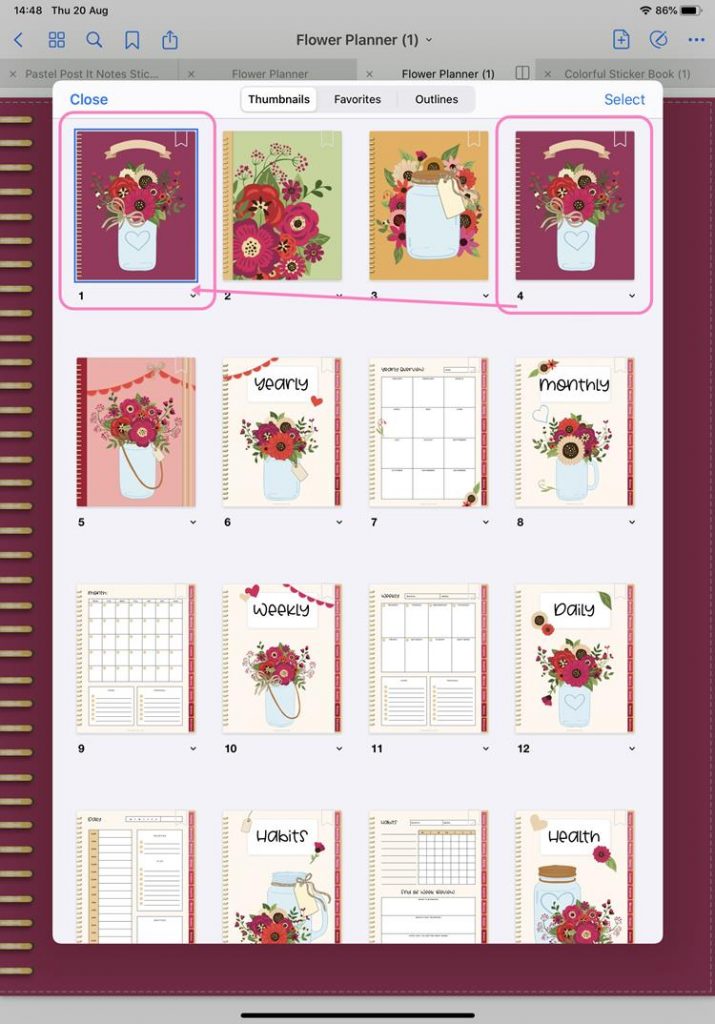
Once it is moved to the first position it will become the document’s new cover page.
Want To Learn More? Find All My GoodNotes Tutorials HERE
Method 2: Import A Notebook Cover To GoodNotes
In case your extra covers are not already inside the document, it is still simple to change a notebook cover.
Here’s how to add a cover from another location.
Inside the document click on the ‘plus’ sign to add a new page.
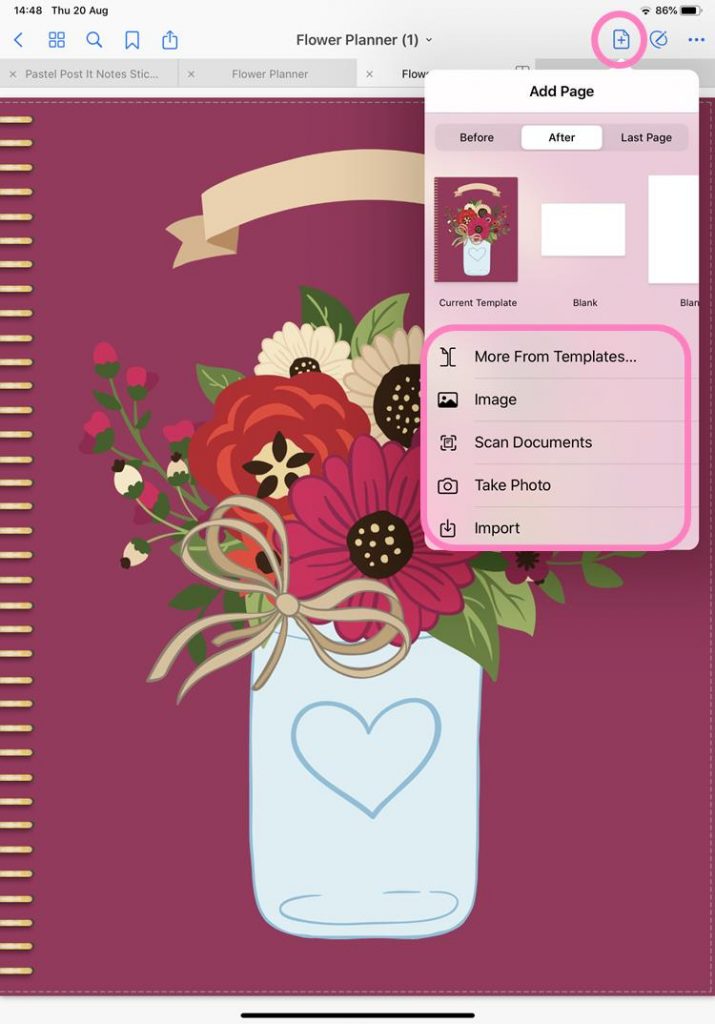
You can add an image from the available templates or click to import a custom notebook cover to GoodNotes.
Once you find the cover just click on it to import.
Now you can change the position of this file to place it as a cover. To do so go back to the go to the page’s settings tab at the top left corner of the app.
Tap and hold on the cover you want to use and drag it to the first position of the document, it will become page number 1 in the document.
Now that it’s page 1 it’ll automatically become the cover of this document.
And that’s how you add a GoodNotes 5 custom cover to any notebook or planner.

More GoodNote 5 user guides and tutorials:

PIN FOR LATER!
