Are you struggling to add digital stickers to Noteshelf digital planner? Let me show you this super easy hack to add several images to Notebook quickly and stress-free…you’re going to love it!
If you have been using Digital Stickers for a while you have probably seen the pre-cropped Goodnotes sticker books for digital planners being sold on Etsy.
These sticker books are an easy way for customers to import several digital stickers at once without the need to add the files one by one.
Need more beautiful Digital Stickers to make your planner more practical while creating a personalized and stylish look? Check out my Digital Stickers HERE.
But what if you don’t have Goodnotes?
The good news is that you don’t need Goodnotes to save yourself time and effort. You can do the same with the Noteshelf app!
In this tutorial, I am going to show you the easiest way to add stickers and create a sticker book in Noteshelf.
We may get commissions for purchases made through links in this post. For more information go to Disclaimer & Disclosure.
How To Add Digital Stickers To Noteshelf
If you already know your way around Noteshelf, you might be tempted to start adding images to your Notebook by clicking the ‘plus’ sign on the top left corner of the app.
Before you tap that ‘plus’ sign I can tell you from personal experience that this is a slow process. I also can’t seem to find a way to locate the PNG or JPEG images saved in folders other than the photo folder.
The easiest way to add stickers to Noteshelf is by splitting the iPad screen in half to drag and drop images.
Let me show you how to do this simple method.
1. How To Drag And Drop Images In Noteshelf
First things first, open your Noteshelf app. Then find the notebook or Digital Planner that you want to add your digital stickers to.
You can either create a new document or add digital stickers to any page in an existing document you have in the Noteshelf app.
Now gently swipe up from the bottom of your screen until you see the dock.
Pro Tip: The iPad Dock shows your favorite apps or those that you have opened recently.

The iPad Dock.
Next, tap and hold the app where your images are located. Then drag it to either side of the screen to start split view.
You can now use both apps at the same time. Pretty cool, right?
Now you can go ‘locate your images’ that are your Digital Stickers inside your folder.

iPad split view of Noteshelf and folder app.
I treated myself and bought these cute calendar PNG images over on Etsy. To insert them into the notebook I simply just tap and hold the image for a second then drag and drop it in Noteshelf.
Easy!

Add digital stickers to Noteshelf by dragging and dropping images.
Once you are done importing the images simply slide the folder app to the side to get Noteshelf back in full-screen mode.
Ready For The Next Step? Learn How To Make Digital Stickers
2. How To Export A Noteshelf Sticker Book
Now you can easily add digital stickers to Noteshelf it’s easy to learn how to create your own Noteshelf Sticker Books.
With the lasso tool on the top of the Noteshelf App screen, you can edit, resize, crop further, or just copy and paste these images into other notebooks.

Resize and crop images in Noteshelf
To create a Noteshelf sticker book, firstly drag and drop all images you want to have inside the sticker book. Now you can rearrange them inside your notebook pages. Don’t worry if they won’t all fit on one page, you can create as many pages as you need or want.
Now you must export the entire notebook in Noteshelf format.
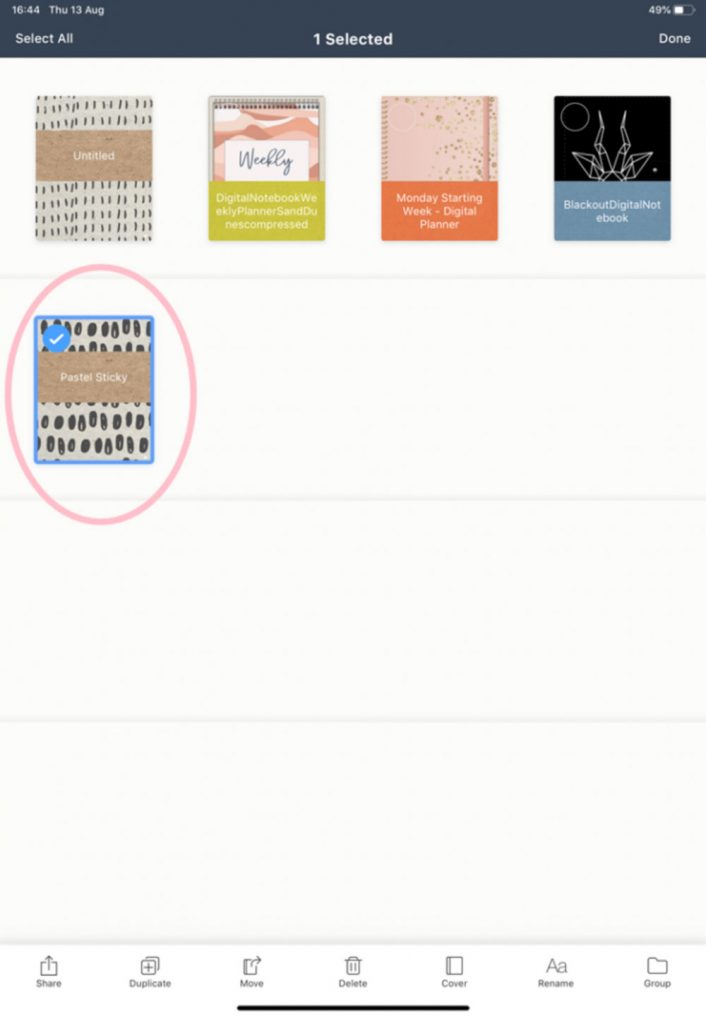
To do this, you need to go back to the library and select the file you want to export.

Select your newly created sticker book to export
Click on the ‘Share‘ on the bottom to export the document as a Noteshelf file.

Share as a Noteshelf file
The Noteshelf document will include all images you already added. This file can be shared and imported in the same way you would import a digital planner to Noteshelf.
And that is how you can create a stickers book in Noteshelf the easy way!
More Digital Planning With Noteshelf:
PIN FOR LATER!


