Looking for a free program to create beautiful digital stickers? You are in the right place, check out my easy tutorial on how to create stickers in Google Slides. Perfect for your digital planner and more.
I love to make Digital Stickers for my Planners. They are such a fun way to make important information stand out on your planner pages and to create a theme or style.
Google slides is the app with the most powerful features for presentation creation. And the best news is that it is free, simple to use, and excellent if you are just getting started with digital planners.
Although I don’t personally create most of my digital stickers in Google Slides it is a really great way to create digital stickers if you are not designed-minded, or don’t have the knowledge to use more advanced designing programs.
Although it is simple to use you can do a lot of really cool things inside Google Slide.
The best part is that it allows you to export the designs as PNG files which is the best format for Digital Stickers.
So without any further delay let me show you an easy way to create personalized digital stickers inside Google Slides.
We may get commissions for purchases made through links in this post. For more information go to Disclaimer & Disclosure.
How To Create Planner Stickers With Google Slides
So let’s get started!
1. Create Your Blank Google Slide
The first thing you need to do is go ahead and open up Google Slides.
Next, create a blank presentation.
I always start by setting up the slide size to 500 by 500 pixels. To do this, go to the ‘file tab’ at the top of the page and then click on page setup.
I personally find that this is a great size for digital stickers, they are not too small or too big for your planner. Be sure to have a play with the size yourself though to see what works best for you and your personal needs and likes.
Once you have selected the size you want you can start inserting your shapes.
2. create stickers in Google Slides
You can choose from any of the shapes available or import another graphic or clipart if you like.
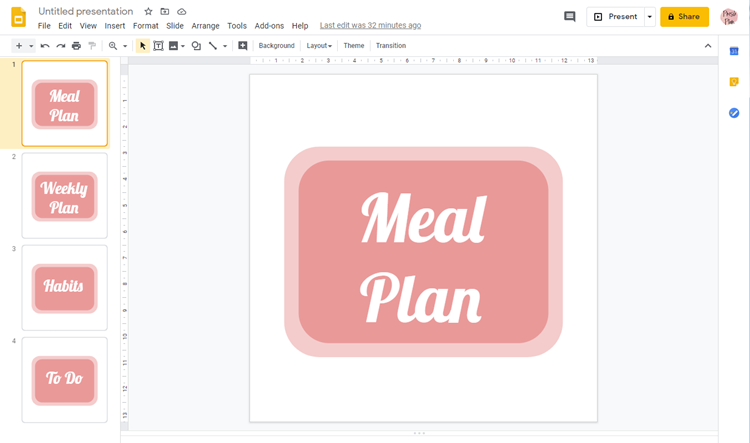
I’m going to work with the shape in the image below that has rounded corners to be the base of my sticker set. I’ll also add a second shape to create the impression that my design has a border.
Once you are happy with the design you can change the colors of the shapes and the outline too.
3. Add Text To A Digital Sticker
Now it’s time to add the sticker text.
Insert a text box by clicking the box with a ‘T’ inside it on the toolbar.
Type the text you would like, then increase the size and change the font as you wish, you can also change color to match your sticker shape. To do this make sure your text is highlighted and then you will see the options for font size, style, and color in the toolbar.
4. Make A Digital Sticker With A Transparent Background
At this point I am going to change the transparency of the slide itself, to have a transparent background. I do this to make sure that when I export my file I don’t get a white square around it. If you leave a white background it can cover text or look odd on colored planner pages when you start using your digital stickers in your planner.
To do this click on ‘Slide’ on the toolbar, then select ‘change background’ from the dropdown menu. If you click on the box next to ‘color’ you will see an option for ‘transparent‘ at the bottom of the color swatches.
5. Create Multiple Digital Stickers With The Same Theme/Style
When the sticker is ready you can create more of the same style easily!
The most simple way is to duplicate your slide and then change the text. You can duplicate a slide easily in Google slides by pressing Ctrl and D simultaneously.
Then you can the text on each slide to create several stickers that will create a style or theme in your digital planner.

Ready For The Next Step? Learn More About Digital Stickers HERE
6. Export Digital Sticker As PNG File
Finally, you will want to export the stickers so you can start to use them.
Head to the file tab at the top, click on ‘download’ and then download it as a PNG file. It is important to choose this file as this will make sure you keep a transparent background.
You will need to repeat this step for every slide you have created.
Once you have downloaded all the pictures, you can open them up in your downloads folder file to find your newly created stickers.
Then the exciting part…you are ready to import the stickers to your digital planning app.
Google slides is just one way you can create Digital Stickers. There are several other programs you can use to create digital planner stickers. It is a great idea to play around with a few different apps to see which one you prefer to use.
Enjoyed this post on how to create stickers in Google Slides? Check out more posts you may like below.
More digital planner sticker posts:
PIN FOR LATER!


